
Like most people, you probably didn’t care much how the floor of your garage looked like because “it’s just a garage.” But now, you are tired of checking whether the coast is clear before you drive in or out. Perhaps it’s time you got a garage that will keep your valuables protected while at the same time offer you a nice place you can enjoy your favorite beverage with the door wide open on a relaxed day.
Garage Floor Solutions
- Concrete Garage Floor Solutions
- Slippery Garage Floor Solutions
- Wooden Garage Floor
Concrete Garage Floor Solutions
Concrete is a cheap, durable, versatile, and easy to construct garage floor. You need to pour a concrete layer over your dirt garage floor at temperatures ranging between 50 – 70 F and let it set. You could make this concrete floor more appealing by using paint or a sealer.
Floor Paint

Image Credit: Billshowto
Applying floor paint on your concrete is an easy and inexpensive way of protecting the floor and making your garage appealing. Although paint is the least durable type of flooring, it gives your garage a nice glossy revamp. Applying floor paint over cracks or chips could give disappointing results in the end. So, it’s always good to repair the floor with a concrete filler before applying floor paint.
Concrete Sealer
 Image Credit: Chendyy
You could also apply a concrete sealer to your old garage floor to give it more sheen and appeal. A concrete sealer is an excellent damp garage floor solution for garages located in areas prone to warm weather condensation. It seals the vapor that often turns into moisture and protects your valuables from damage due to excess humidity. Consider going for a water-based concrete sealer if you have a family with small children. Although it doesn’t last long, it is more tolerant of breathing in than a solvent-based sealer.
Concrete Stain

Image Credit: Creto Seal
Adding a thin coat of concrete stain to your floor is the easiest and cheapest way of refurbishing your garage. It gives an old floor a natural stone look by letting it show through the attractive watercolor. It also seals off the cracks and pits by fusing and becoming part of the concrete, and this attribute makes it an excellent wet garage floor solution. Its ability to protect the garage from chipping makes it more durable than concrete.
Slippery Garage Floor Solutions
A slippery garage floor is a safety hazard that could be fatal, especially if the garage is used for storing work tools. The danger of slipping becomes even more significant when the weather gets wet. Below are a few ideas that you could consider for your slippery garage floor.
Non-Slip Paint

Image Credit: polycote.com
It’s easy to install non-slip paint on your garage floor. You only need to mix a pound of sand in each gallon of floor paint to get a less slick floor texture. Non-slip paint provides a firm floor grip that is easy on your feet and prevents you from slipping.
Anti-slip Tape

Image Credit: gripfactoryantislip.com
Alternatively, you could use anti-slip tape to add a rough texture to a slippery floor. Nonskid tape functions by resisting the moisture on the floor. This makes it an excellent slippery floor solution, mainly when applied in strips around areas prone to water, such as common walking areas and beneath vehicles where moisture drips onto the floor.
Epoxy Coating

Image Credit: Mike Day Concrete
Epoxy coating is a well-known solution for slippery floors. It is quite slippery especially when it is wet. So it’s often applied in addition to an anti-slip frit on the surface of the garage. This coating makes the floor surface soft enough for you to walk on without bruising your feet but grainy enough to prevent accidental falls or slips.
Epoxy coatings make your concrete floor much stronger than other coatings. The other great thing about using this type of coat is that it’s quite durable. Depending on the type of epoxy used, the coating can last for between 7 to 20 years before you refresh it. It is also resistant to water, fire and germs and bacteria. It’s critical to note that in case of a fire outbreak, epoxy produces very toxic flames. Caution is needed when using it.
Wooden Garage Floor
Wood is not an option that most people go for when considering garage flooring solutions. However, it is an investment that you could make not only for its pleasant appearance but also for its durability. If engineered correctly, such a floor could last a lifetime.
Engineered Wood Flooring

Image Credit: Uafloors.com
Engineered wood is a type of hardwood that can be installed over concrete or a dirt floor. Engineered wood makes better garage floors than solid wood because it can withstand the high moisture found in most garages. If you choose to go for an engineered wood flooring, make sure that the temperature of your garage is controlled to increase the lifespan of the floor.
Wood Composite Tiles

Image Credit: CompositeDeckingTile
You could also opt to renovate your garage floor using wood composite tiles. This is a good dirt floor garage solution that is easy to install and can withstand normal garage usage. Wood composite is made from the combination of plastic and wood powder which are resistant to moisture in humid places. These tiles are a great alternative to real wood because they cannot be attached by bugs like termites.
Composite tiles also have groove and tongue edges, and hence they do not need to be fixed with glue. You only need a hammer, a block of wood, and a drill to fasten the tiles to the subfloor with screws. Be sure to leave gaps between the tiles to allow room for the wood panels to contract and expand as the weather changes.
Water-Based Polyurethane

Image Credit: Shannon Ambrosio
Water-Based Polyurethane gives garage floors a clear, wet, smooth, and lustrous surface easy to clean. It is always good to sand the wood till it’s smooth before applying this coat because it tends to highlight imperfections on the wood surface.
Oil Sealer

Image Credit: AUROtv
If you use your garage quite often, then an oil sealer is a wooden garage floor coating that you should seriously consider to get. This coating gives the floor a low-gloss natural appearance that is more suitable for frequently used garages. The main disadvantage of this option is that it has a longer dry time and one has to reapply the sealer every five or three years.
Hard-Wax Oil

Image Credit: Treatex
Hard-wax oil also has a natural warm finish and is relatively easy to apply. It provides excellent protection from wear, damage, and moisture, and it’s the perfect choice for people who need a low-luster and easy-to-touch-up coating. The wax finish should be applied and repeated after every two years.
Hard-wax oil takes about 2-3 days to dry up. However, it takes a much longer time to cure- between one week and one month. Care should therefore be taken before the floor is used. Key factors that facilitate the fast drying and curing of this coating include low humidity levels, warm temperatures, and good airflow.
Acid Cured Coating

Image Credit: Syntekoflooring
The acid-cured coating is a highly durable finish that is used for exotic wood or smooth textured flooring. Although acid-cured finishes give floors extra protection, you should be aware that it is highly toxic. Its toxicity could last for a few days or stretch out to a month.
Aluminum Oxide Coating
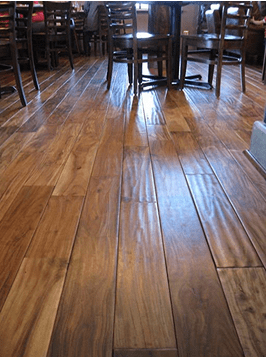
Image Credit: Amazon.com
Using Aluminum oxide coating for your garage floor will give you protection for up to 25 years of traffic. This wood finish provides a scratch-resistant top layer that also guards against oxidation. It seals the top surface and prevents fluids from leaking through.
This coating is particularly beneficial when used on engineered hardwood flooring because it is thinner. The hardwood does not, therefore, require to be sanded before the coat is applied. To give your floor maximum protection, apply 5 to 10 coats of aluminum oxide. The more the coats applied, the longer the protection your floor will have.
How to Build a Wooden Garage Floor
Having a dirt garage floor can be limiting, especially when most of the available space is used as parking or as a workshop. You can increase the utility of your garage by constructing a wooden floor over the dirt floor using the following guide:
Step 1
Leveling the ground. Use a rake to level the ground and then compress the dirt to solidify the surface. Before placing the flooring, it is essential to check whether the floor is using a carpenter’s level. Ensuring that the ground is even will keep the floor even after construction.
Step 2
Cover the dirt garage floor with a 10-mil plastic sheeting. This cover creates a vapor barrier that prevents moisture from seeping through the dirt and into your garage door. The sheets should be laid out in rows across the dirt floor and overlapped on the edges next to the wall, with two inches of plastic sheets raised above the ground and against the wall.
Step 3
Use a utility knife to cut the plastic to size and then stagger the joints between the plastic sheet rows to add strength. Then use masking tape to secure the plastic sheets to the walls and then cover the seams between the sheets with masking tape.
Step 4
Place ½ inch layer of polystyrene insulation over the plastic sheet to protect it from punctures. You should then add insulation to the floor and cushion the planks. Butt the insulation closely together and use fiberglass tape to cover up the seams. Cut the sheets to size with a utility knife and leave a 1/4″ gap between them and the walls to allow for expansion and contraction.
Step 5
At this stage, you should determine the number of floor joists required to cover the floor by measuring the length and width of the garage with a tape measure and dividing the length into 16 inches. Use a circular saw to cut a 2-by-4 plank for each joist and then set the planks along the wall edges and in 16-inch intervals between the edge pieces.
Step 6
Use the 4-inch side of the planks to serve as the floor joists. Set the first two planks against the wall, then measure 16-inches from the center of the planks laid out on edge. Place the next plank on the 16th-inch mark and continue laying the new planks across the plastic sheeting until you reach the opposite wall.
Step 7
Lay the plywood sheets over the planks while leaving 1/4-inch along the walls and a 1/8-inch gap between the sheets. Then using a circular saw, cut the sheets and use them to cover the partial areas. Use the unused portion of the last sheet that you cut in a row to begin new rows to reel the joints between the rows.
Step 8
Use a hammer and 2-inch nails to fasten the plywood sheets to the 2×4-inch floor joists every ten inches lone the joist. You could use silicone caulking to seal the joint to allow the flexible movement of the wood as the contract and expand.
Conclusion
You could entertain numerous ideas to give your garage a fresh, protect your concrete slab, and add some style to your floor space. If you have a dirt floor, your first option is to use concrete. You can coat it with concrete floor paint, sealer, or epoxy if you already have a concrete floor. While the first and second choices just add some color and style to your floor, epoxy provides you with both durability and effectiveness.
If you want to mask cracks and chips on the concrete surface, you could use wooden or plastic flooring solutions available in the market. Your need will determine the choice you make. While most of the available options are easy to install, remember it’s always best to engage a professional if you are experiencing severe moisture or structural issues.


