
A thermos flask is a great beverage container to have by your side all year round. It helps keep your cold drinks cold, and hot beverages hot for a long time.
In this article, we’re going to show you how you can create your low-cost thermos flask from a glass bottle. With insulation and a bit of piping, you’ll be able to create a super-insulated flask for storing your drinks.
So, let’s get to the workshop to start building.
What You’ll Need
Before you start building the flask, you’re going to need a few items. They include;
- A Glass Bottle (A Milk Bottle or Apple Juice Bottle)
- A 2.5” Thick Sheet of Insulation Foam.
- 4” Diameter Bell End Pipe with End Cap.
- Bell End Pipe Connector with End Cap
- Spray Foam Insulation
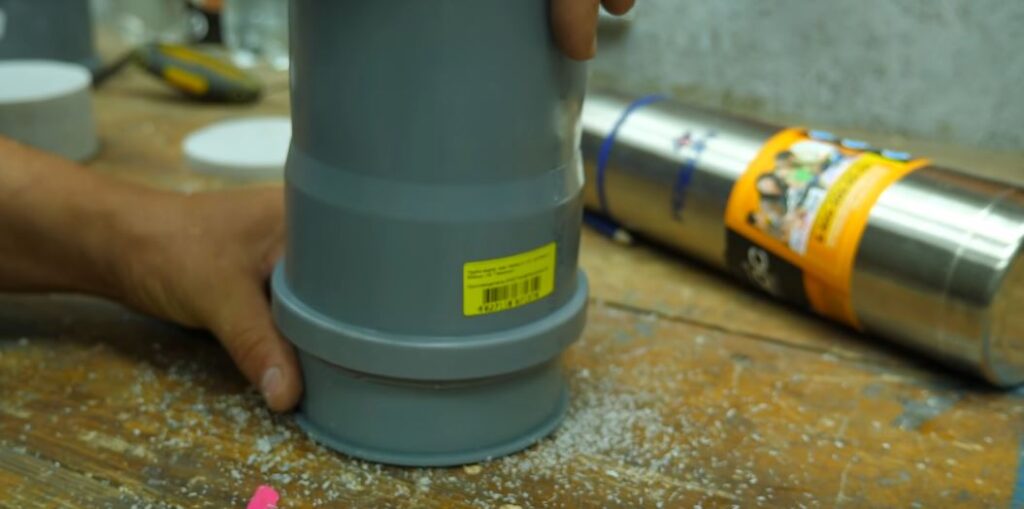
Measure And Mark out The Pipe for The Flask


Place the 4” diameter pipe on your workbench. Measure the height of the milk bottle using a steel rule.
Mark out the dimension you just measured on the 4” pipe. Place both the pipe and the bottle upright. Make sure the bell end side of the pipe is the one resting on the workbench.
Place a pencil on top of the bottle’s cap. Hold the pencil down and rotate the pipe against it. This will form a circular outline on the pipe.
Cut Out the Pipe Section for The Thermos
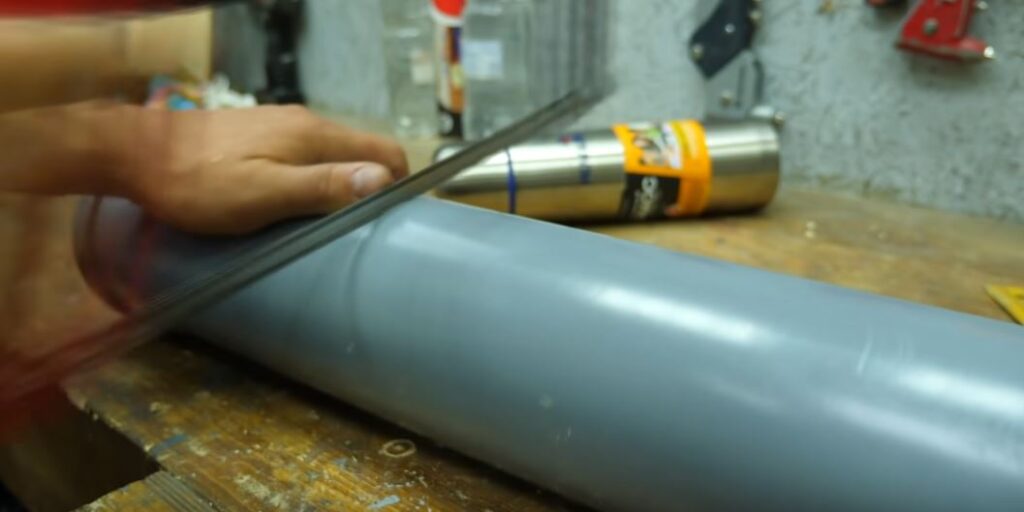
Hold the pipe firmly in one hand or clamp it securely in a vise. Using a hacksaw, cut the pipe section all around the circular outline you just drew.
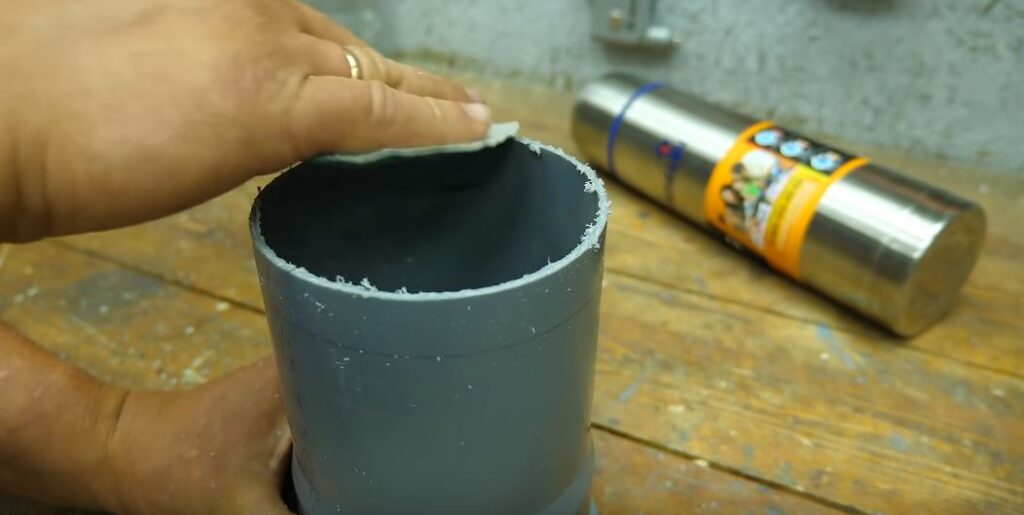
Be careful to keep the cut straight all around. After cutting, sand the edges of the pipe with sandpaper to get rid of any burrs and rough edges.
Mark Out the Insulation for The Thermos


Place the 2.5” thick insulation foam on your workbench. Place the smaller end of the pipe section you just cut right on it.
Using a pencil, trace out the outline of the pipe section on the foam. Do this like five more times to get the remaining outlines.
Make sure you space the outlines well on the foam.
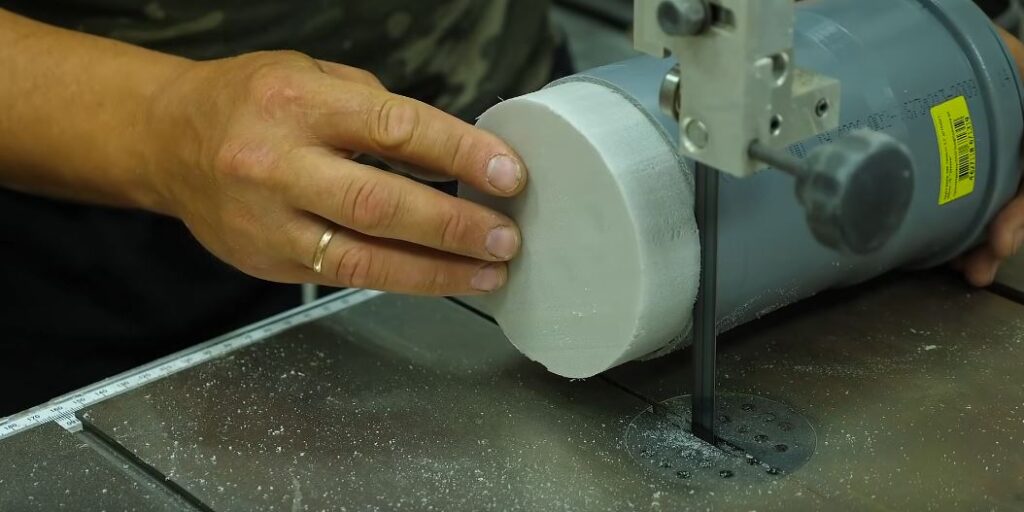
Cut Out the Insulation for The Thermos

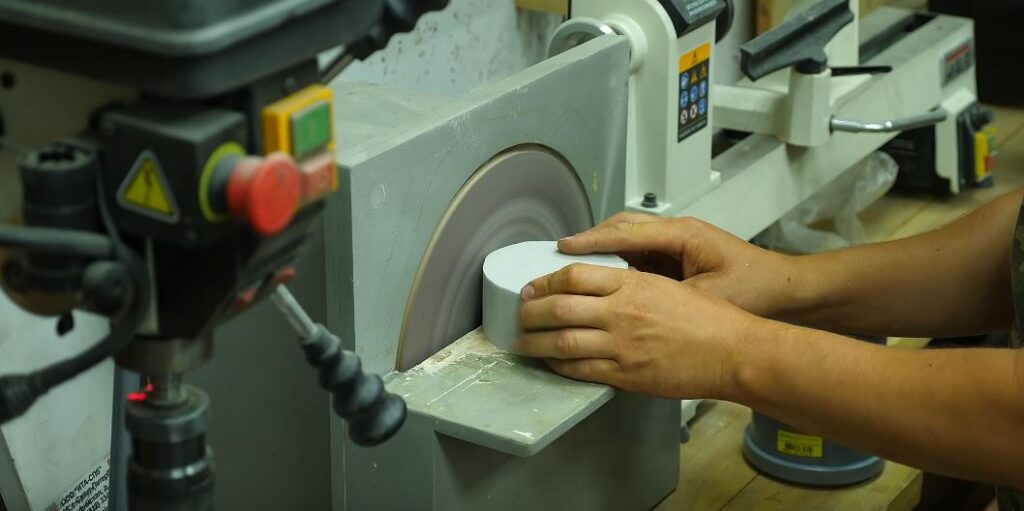
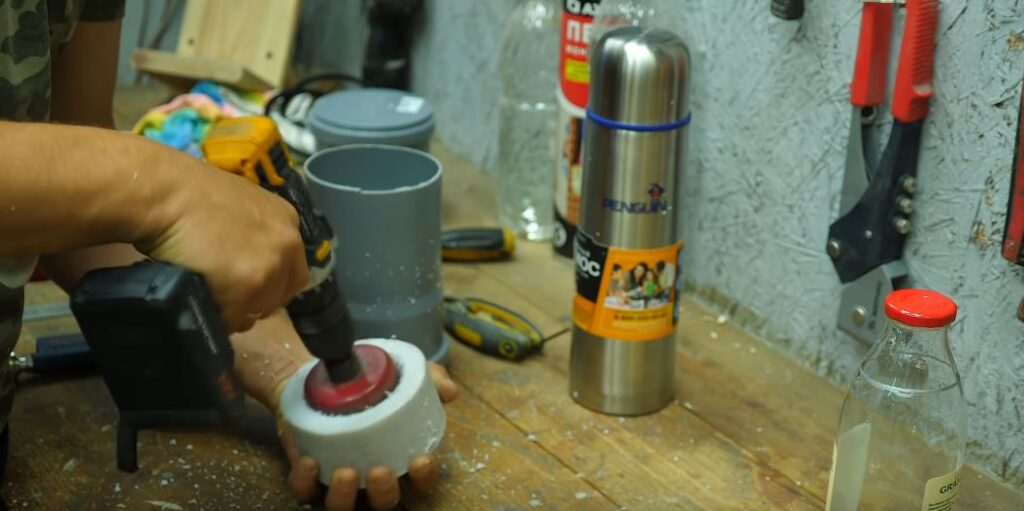
Using a band saw, cut out the rough shape of the circular outlines from the insulation foam. You don’t need to make a perfect circular shape with the band saw.
You can cut out a rough shape using the bandsaw and finish it to a perfect circle using an electric sander.
Fit The Insulation Inside the Thermos
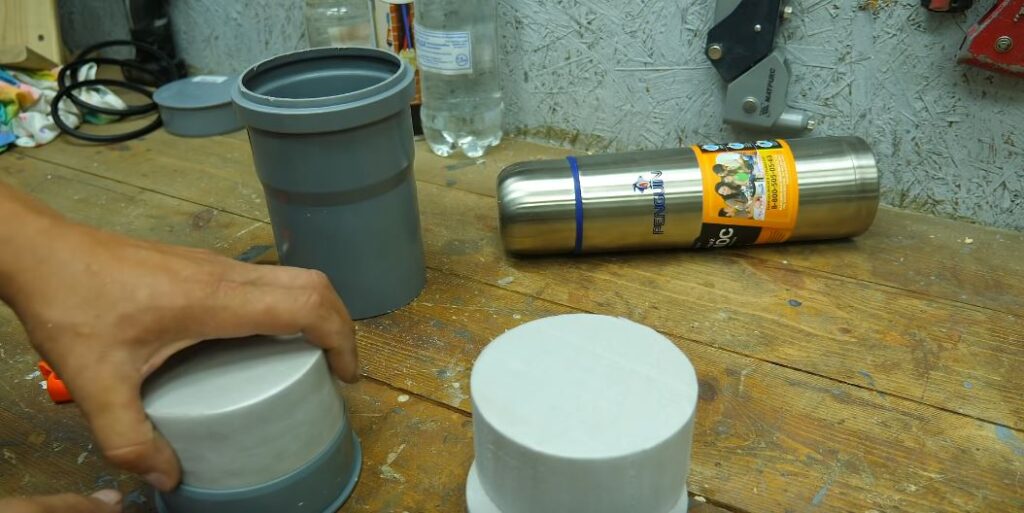

After cutting up the insulation, it’s time to stack them inside the pipe section to form the inner wall of the thermos. First, take the end-cap of the bell end pipe and place it on your workbench.
Stuff one of the circular insulation pieces you just cut into it. If it doesn’t fit properly, you can reduce the diameter by just a bit.
Note: Be careful when reducing the diameter of the insulation, The fit between the pipe and the insulation should be a tight one.
Next, insert the endcap with the insulation into the bell end pipe and push it in firmly. Next, start stacking the remaining circular foam pieces inside the bell end pipe.
Do this until the pipe is full. Make sure you stuff the pieces in tightly with no air spaces between them.
Trim Off Any Excess Insulation
After stuffing the insulation inside the pipe, there might be some excess pieces coming out of the pipe. Using the bandsaw, trim off the excess piece of foam off the top of the thermos.
Make sure the remaining foam in the flask is perfectly flush with the top of the flask.
Cut A Hole for The Base of The Bottle


Take off the end cap of the thermos flask and remove the insulation from it. You’re going to divide the insulation into two pieces.
One piece should be about an inch thick, the other should be 1.5” thick. Take the 1” thick piece and place it back inside the end cap. It will form the base of the flask’s insulation.
Next, measure the thickness of the glass bottle you want to use for the flask. Using a dimension slightly larger than the thickness, drill a hole in the 1.5” piece.
Remember, the bottle and the insulation need to fit together tightly. So, the hole should be only slightly larger than the bottle.
Put the 1.5” piece back in the end cap on top of the 1” piece.
Cut Out Holes for The Rest of The Bottle in The Insulation Foam

Take out the remaining pieces of insulation from the bell end pipe. Keep one of these 2.5” pieces to one side.
For the remaining pieces, drill a hole through them with the hole saw. Use the same dimension that you used when drilling a hole for the bottle’s base.
Connect the end cap and its insulation back to the flask. Put the remaining insulation foam with holes right back into the flask.
Cut Out a Hole in The Insulation Foam for The Bottle’s Neck
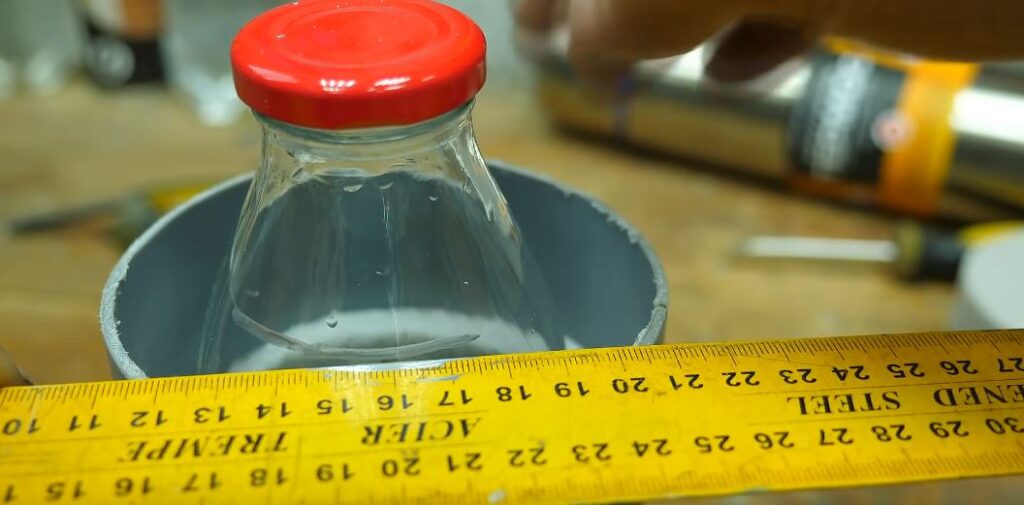
After putting the insulation back in the flask, put the bottle in between the insulation in the flask. Make sure the bottle fits snugly and tightly in the middle of the insulation foam
Using a ruler and a marker, draw a line around where the top of the flask intersects with the bottle’s neck. Remove the bottle and measure the diameter of that point where you marked.

Remember the last piece of insulation you set aside? You’re going to use it now. Using the right hole saw attachment, drill a hole equal to the diameter of the neck you just measured.
After drilling the hole in the insulation, you still have to enlarge it on one side so it can fit the bottle. So, using a box cutter, try and shape the bottom of the insulation so it fits the bottle better.
Place The Bottle Back in The Flask


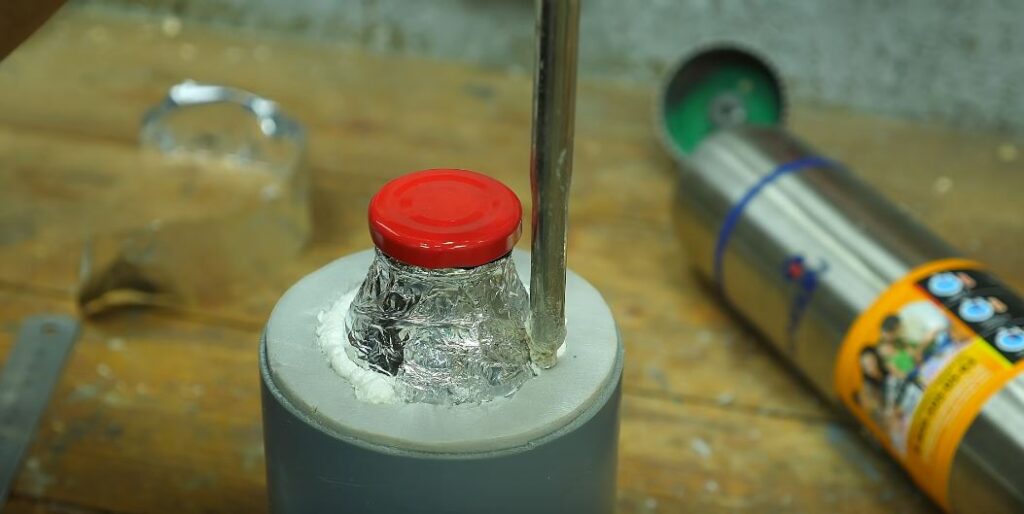
Take a roll of aluminum foil and unspool it on your workbench. Next, place the glass bottle on the foil and wrap it up with the foil.
Make sure the foil is wrapped snugly around the glass bottle. Also, make sure you cover every surface of the bottle with foil.
After wrapping the bottle, place it back in the middle of the thermos flask’s insulation. Make sure the bottle is sitting snugly.
Place The Last Bit of Insulation Over the Bottle

Once the glass bottle is in the flask, place the final bit of insulation you just cut over it. Make sure the piece aligns properly with the neck and is flush with the top rim of the flask.
If there are any gaps between the neck of the bottle and the insulation foam, fill them with expanding foam. This will help you get a great temperature seal.
Create The Cover for The Flask


Take one of the circular foam pieces and divide it into two. As usual, one part should be 1” thick, the other should be 1.5” thick.
Using the diameter you measure at the bottle’s neck, drill a hole in the 1.5”. Next, place the 1” piece in the second end cap.

On top of the 1” piece in the endcap, place the 1.5” piece. Next, insert the end cap into the bell end connector.
If there is space between the insulation and the walls in the bell end connector, fill it with spray insulation foam. Now, place the cover over the flask.
Now, the flask is finally complete.
Final Product


Your thermos flask is finally complete. To use it, just fill it up with any beverage of your choice.
It doesn’t matter if the beverage is hot or cold, your flask will keep the drink’s temperature stable even after 3 hours. Not bad for a glass bottle and some insulation.

If you’re looking for more useful DIY crafts like the homemade thermos flask, you can check the Home Workshop YouTube channel. You can also follow their Facebook page for regular updates.


