
A portable firepit grill is one of the best ways you can cook meat and other foods on the go or in your backyard. This tool offers you allows you to prepare your meat and other foods in so many ways.
In this article, we’ll show you how to make a cheap, versatile grill from a simple 60 x 60 profile pipe. With this grill, you’ll be able to cook your meat using both direct and indirect heat using an accessory like a meat skewer or grate.
You can also add accessories like a griddle to the grill for making other foods like eggs, pancakes, etc. So, let’s get to the workshop and start building it out.
What You’ll Need?
You’ll need a few items to build this grill. They include;
- A 60 By 60mm Profile Pipe.
- A Sheet Metal Slab
- 4 Coupling Nuts
- ¼” Diameter Rebar
- 4 Long Coupling Bolts
Mark Out and Cut the Profile Pipe
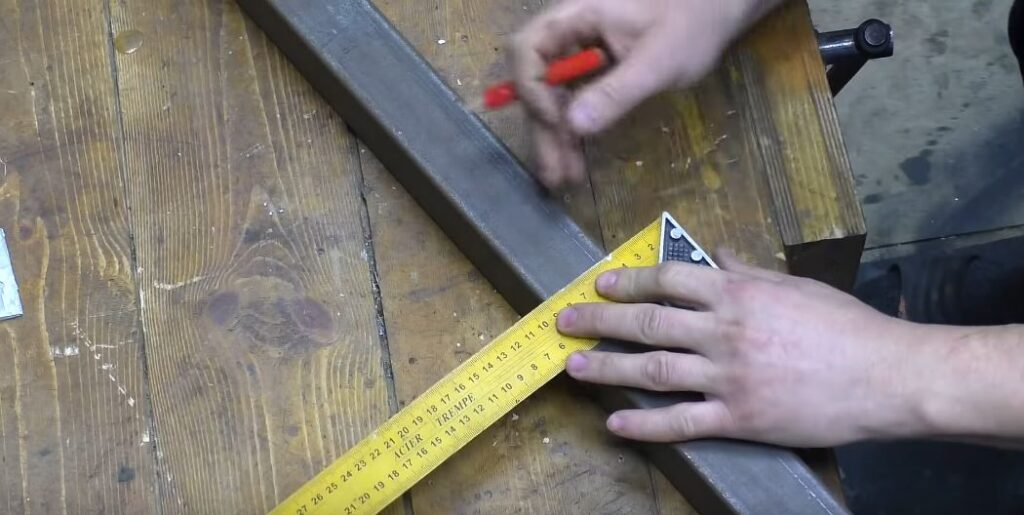

Place the 60 by 60mm profile pipe on your workbench. Using a meter rule, mark out four 45cm long sections on the profile pipe.
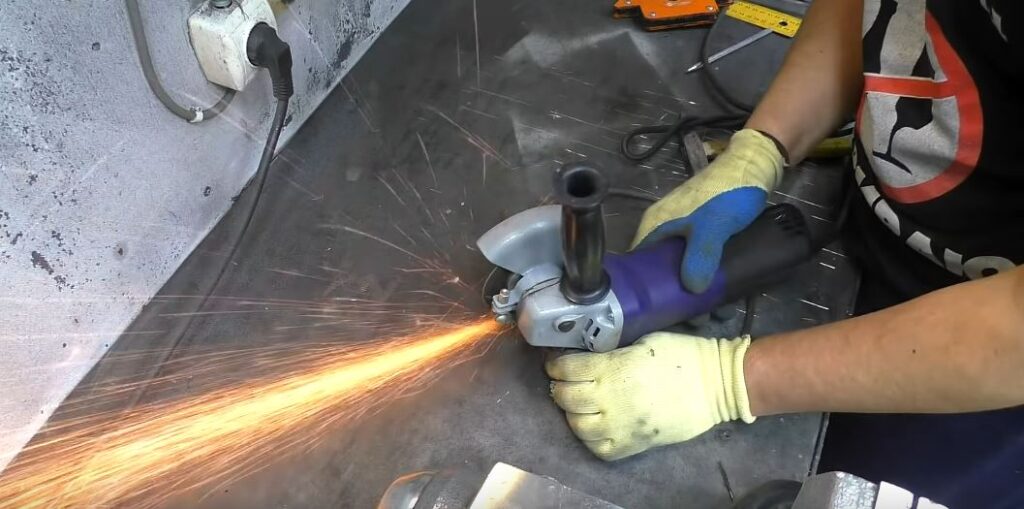
Clamp the profile pipe in your bench vise and make sure it is tightly held. Using an angle grinder, cut out the four 45cm long sections from the pipe.
When using the angle grinder, be sure to wear gloves and eye protection to guard against flying sparks. Also, wear earmuffs to protect your ears from the noise.
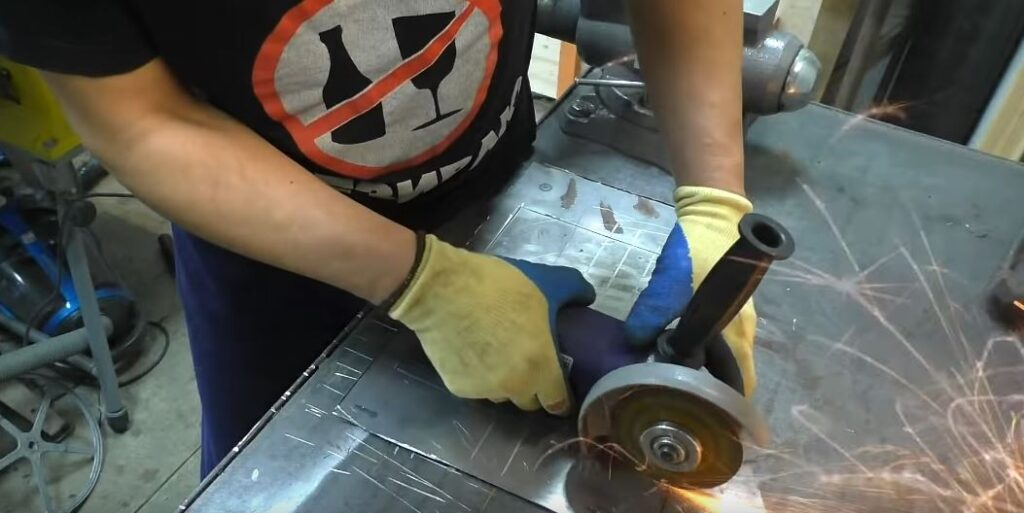
Cut Out a Face from the Profile Pipe Sections


Take one of the four profile pipe sections you just cut out and place it in the bench vise. Using the angle grinder, cut out one of the four faces of the profile pipe.
This way, the pipe will have one section open. Do the same for the remaining three pipes. Don’t throw away the sections you cut out.
You’re still going to use them for the grill later.
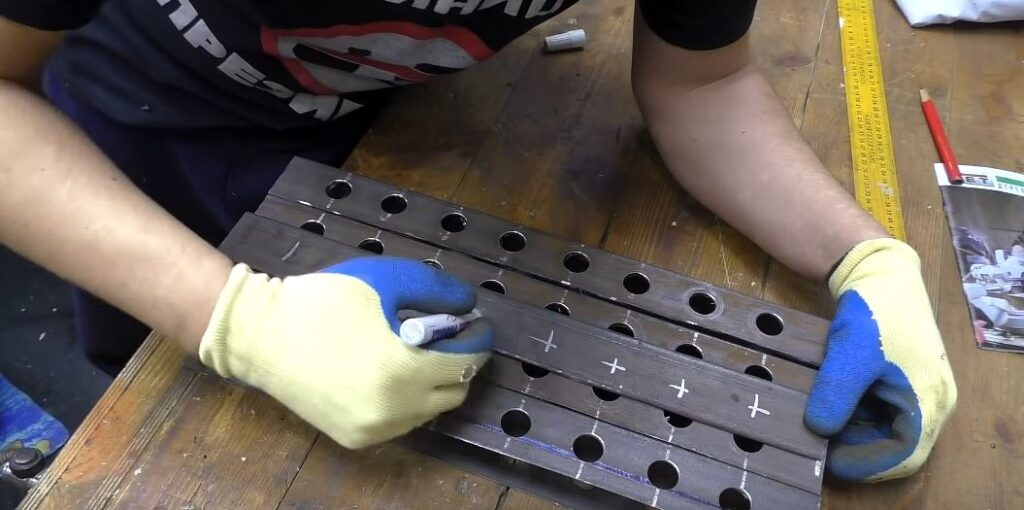
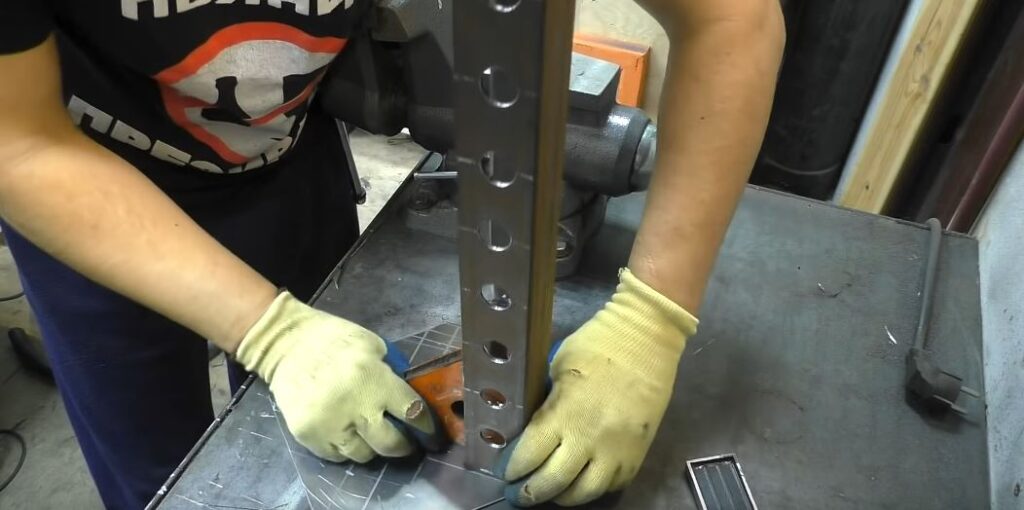
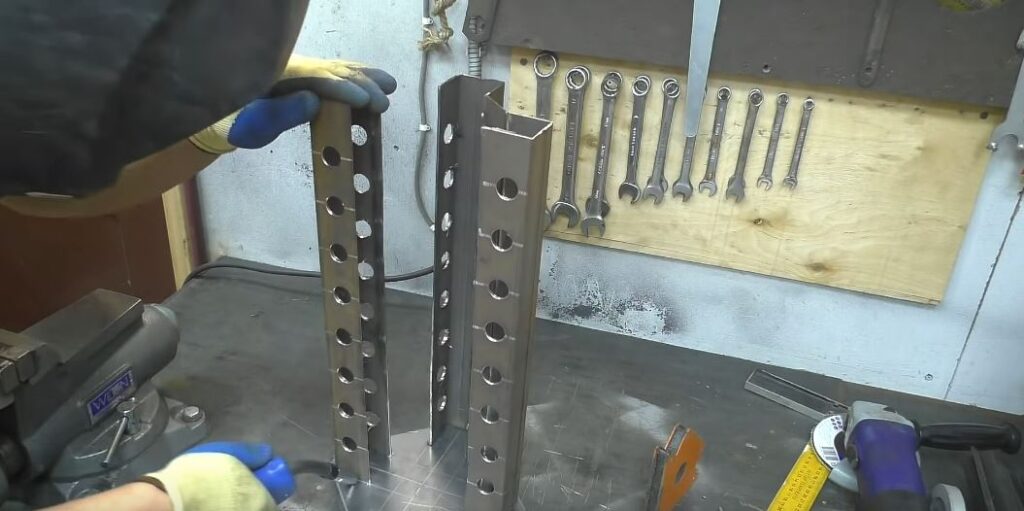
Mark Out the Drilling Points on The Profile Pipe


Place the four profile sections side to side on the workbench with their open side facing the right. Make sure all their bottoms are on the same line.
Using a marker and a try square, divide the profile on the extreme sides into nine equal 5cm sections. Next, connect the lines across all the profile sections to divide the rest.
In each pipe section, mark a point in the middle of each line. That’s where you’ll drill the holes.
Turn the pipe over and do the same thing for the opposite side of the pipe.
Drill Some Holes on The Profile Pipe Section

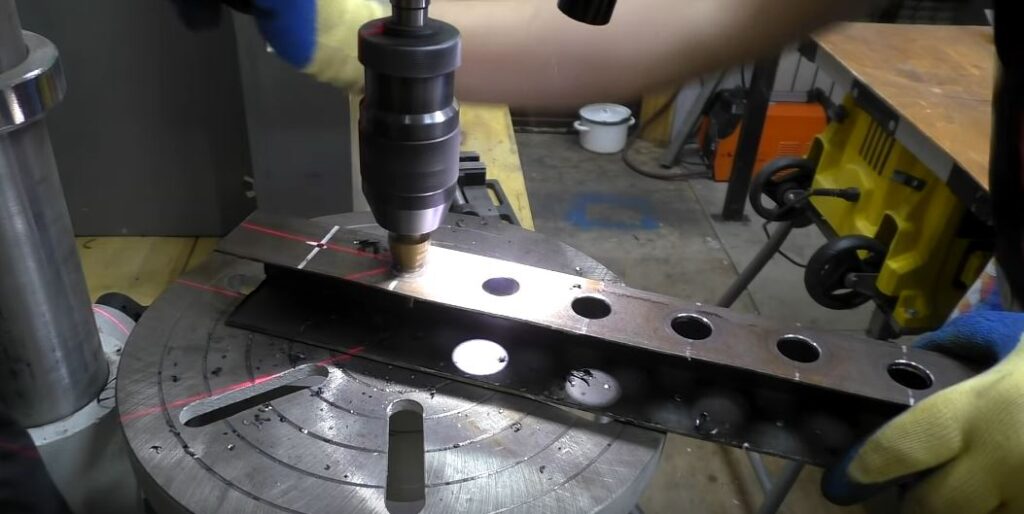
Place one of the profile pipe sections on the drill press with the marked side facing up. Next, drill a small pilot hole on each of the drilling points you marked.
After drilling the pilot hole, enlarge the holes to a diameter of 3cm using a stepped drill bit. Turn the profile pipe section to the other side and drill the points there too.
Do the same for the remaining three profile pipes.
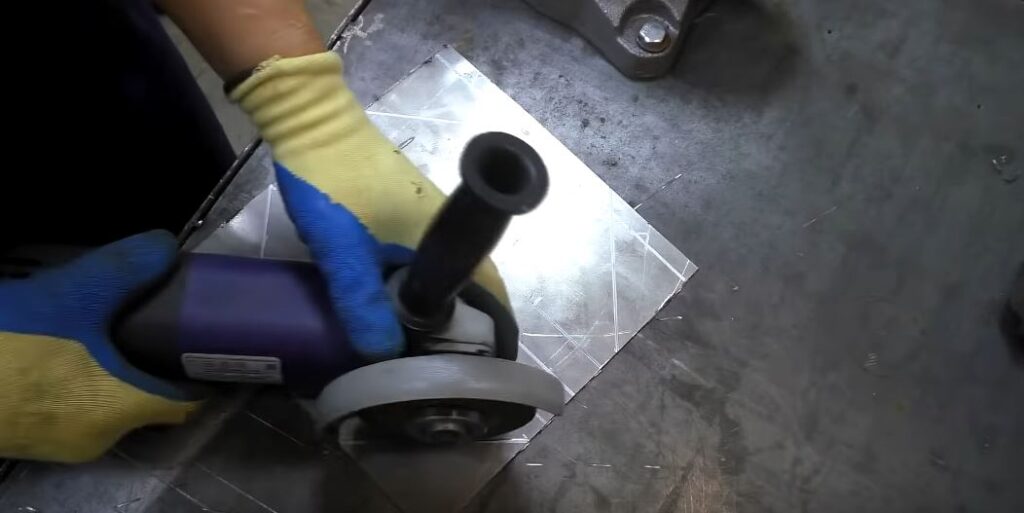
Drill Holes in The Cut Faces
Remember the faces you cut out from the profile pipe, place them back on the workbench. Using a try square and a marker, divide them into nine equal 5cm sections using lines.
Mark out a point in the middle of each line on the face. Those will be the drilling points.
Place the section on the drill press and drill a 3cm hole at each point where you marked. Do the same for the remaining faces.
Mark Out the Base for The Grill
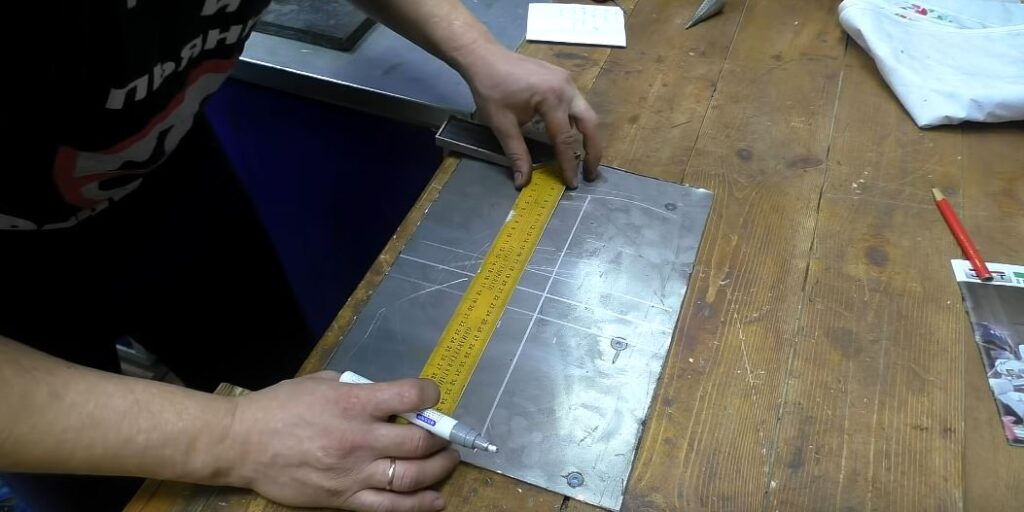
Place your sheet metal on the workbench. Using the try square, draw a horizontal and a vertical line in the middle of the plate.
Next, mark points 3cm away on either side of the vertical line. Using the try square, draw lines that are parallel to the vertical lines through those points.
Do the same for the horizontal line.
Next, mark a point 15cm away from the center on all four lines extending out of it. On those points, draw a vertical line that cuts across all three lines.
You should have sort of a cross shape. The ends of that cross are where the profiles will sit on the base.
Next, connect the corners of the cross to form a square-diamond shape for the base. You can extend the lines a bit past the corners of the cross until they meet.
Cut Out the Base
Secure the sheet metal with the base inscribed on it to the workbench. Use an angle grinder to cut out the base’s shape from the sheet metal.
You can trim the sharp points above the ends of the cross to give the base a chamfered edge.
Weld The Profiles to The Base
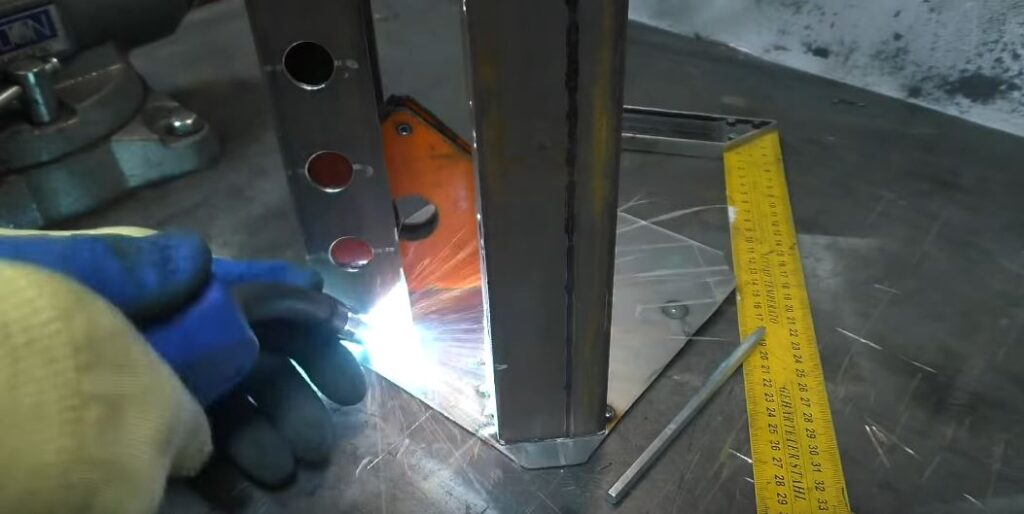
Take one of the profile pipes and place it on one of the ends of the cross in the base’s corners. Secure it in place with a magnetic square and weld it to the base.
Next, place another profile pipe in the corner adjacent to the previous profile. Secure it in place with a magnetic square and weld it.

Remember the faces you cut out from the profiles? You’re going to use them now. Take one of the faces and place it in the middle of the two profiles.
Make sure its edges are touching the two profiles and secure it in place with a magnetic square. Weld the slab to the two profile pipes.

Next, install the third profile pipe in its corner and weld a face between it and the second profile pipe. Do the same for the fourth until the grill is completely close.
Grind The Top of The Grill

Turn the grill so it’s sitting on its bases. Using the angle grinder, grind the top of the grill so the profile pipes and the slabs are the same height.
Install The Grill’s Stands

Turn the grill back upside down so the base is facing up again. Place a coupling nut in each corner of the base.
Weld each coupling nut to the base. Screw the coupling bolts into the nuts
Create The Grill Top

The grill top is going to be the cooking area for the grill. You’ll be able to hang meat skewers from it, place a griddle on it, and even add a grate for direct heat grilling.
Take the rebar and bend it into a circle with a diameter about the same as the grill’s width (30cm). Weld the ends of the circle together.
Next, cut out four 10cm long legs for the grill top. Place the circular rebar on the workbench.
Take the legs and weld them on top of the circular rebar at equal intervals from each other.
Attach The Grill Top to The Base
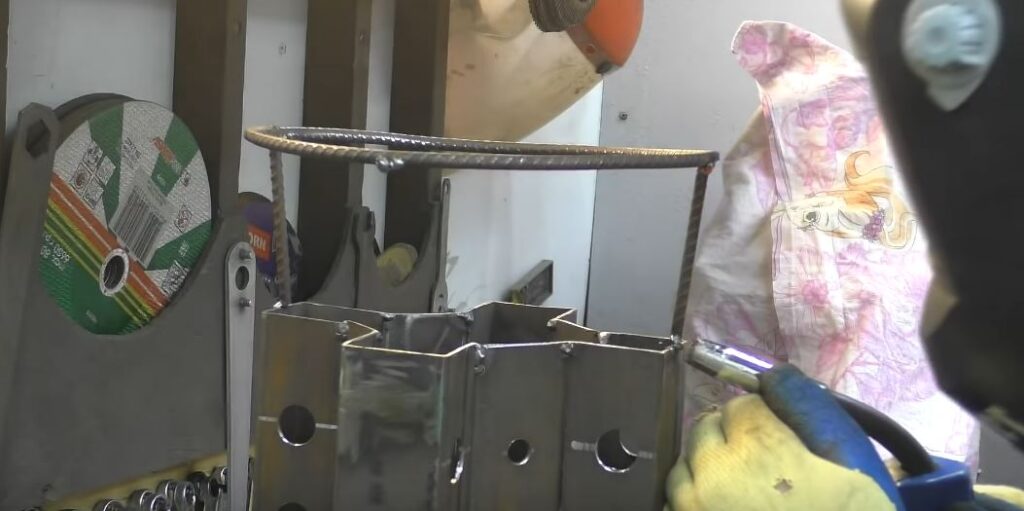
Place the grill back on your workbench so it’s standing on its base. Place the grill top you just fabricated on it.
Line up the legs of the grill tops with the profiles and make sure they are balanced properly. Weld the legs of the grill top to the grill.
Paint The Base

The grill is almost done, all that’s left is a coat of paint. Grind and sand any imperfections or protruding welds away to prepare the grill for painting.
Next, place it on a covered surface and spray it down with black paint until its total covered.
To avoid the paint breaking down and getting in your food, we advise you use high-heat paint like the Rust-Oleum heat coating.
After painting, just wait for the grill to dry and it’s ready to use.
Final Product
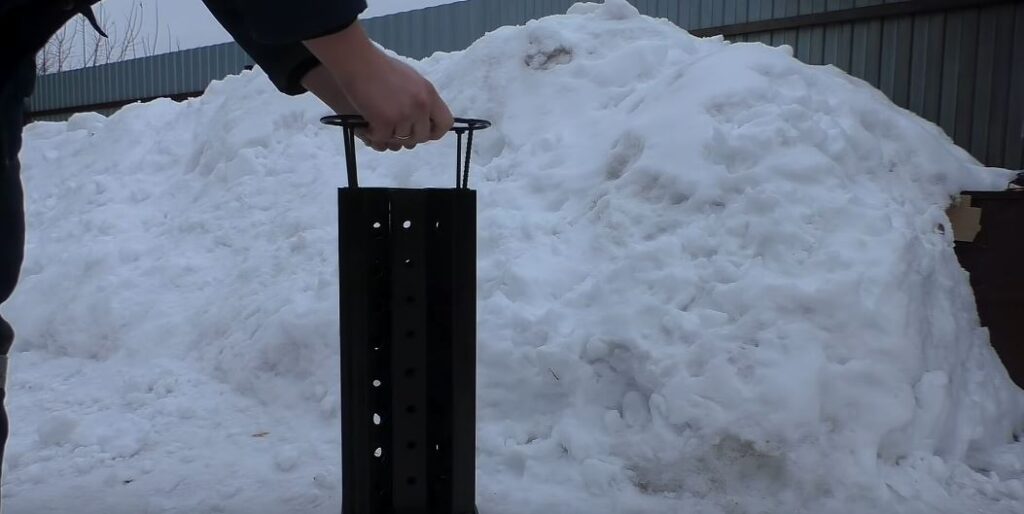

Thanks to your hard work, you now have a versatile grill for a fraction of a new grill’s price. So, bust out those fine cuts of meat and start making some tasty meals on your new grill.

For more videos on how you can create awesome DIY projects like this, check out the Home Workshop channel on YouTube. You can also connect with them on Facebook for regular tips and updates.


