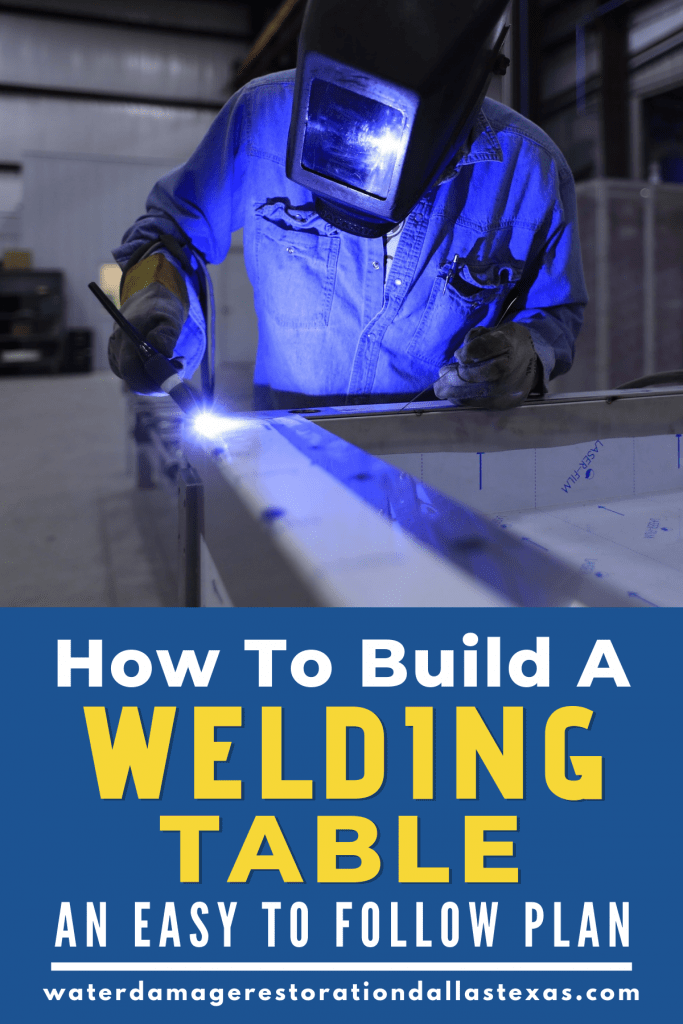
You’ve probably wanted to build a welding table for all of your metal projects but just haven’t found the time or the money to do it. I had the same problem myself, and so I asked myself – “is there a cheap and easy way on how to build a welding table?” And I found a great video on YouTube that breaks down building a welding table into step by step instructions.
You may also be interested in 83 other Welding Project ideas Here
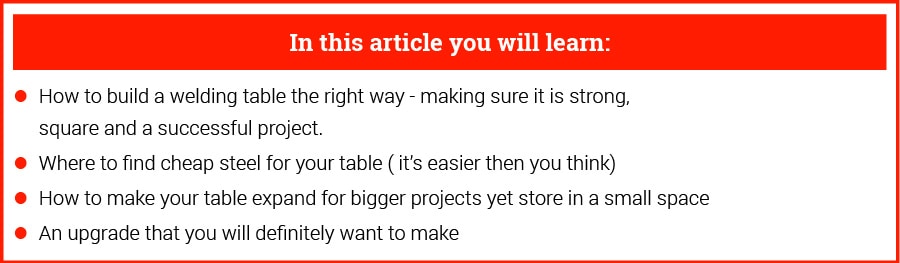
To build a cheap welding table, source the parts from a steel yards scrap room. To make it easy, divide your building plans into stages: Prep, frame, accessories construction, painting, stops, brackets, and accessories mounting, tabletop, and electrical – creating an easy to follow a plan.
So now that you have a plan of action of how you’re going to attack this project, you’ll want to take some measurements of your space and find a size that works. We are going to break down a YouTube video and show you step by step how to build an awesome homemade table – and this one is 30X50 inches in size.
Let’s Set Up Our Plans And Learn How To Make a Welding Table!
Prep Work
You’ll want to secure your steel and have it all ready to cut. You can find a lot of cheap steel in a steel yard’s scrap room. These are offcuts from larger pieces of steel the yard cut to size for a specific customer order. The steel is of odd size – so that means its a great deal for you, making your project so much cheaper! It’s often an overlooked resource for a welding project and can save you $100’s of dollars.
You may also be interested in the making a charcoal grill from fire extinguisher

Now, you’ll cut everything down to size and get it ready for your build. You can use a chop saw or a band saw. Either one will do great.

band saw

cut pieces
Now before we start to actually build a welding table, cut a few pieces of scrap and lay them on your table top so you can get a sense of where you want your legs to be positioned.

Also, make sure you have some strong magnets to hold your table together as you weld things into place.

Frame
Your frame will be the part that holds your table together, so you want to make sure it’s strong, sturdy and straight. You’ll be building two pairs of these legs, then joining them with some cross members.
You’ll lay out your legs on a flat surface, like the table top, and then make sure all your joints are nice and square using the corner magnets, you can even double check your outside corners with a square.
We also think you would like to read more about how to make profile pipe for welding
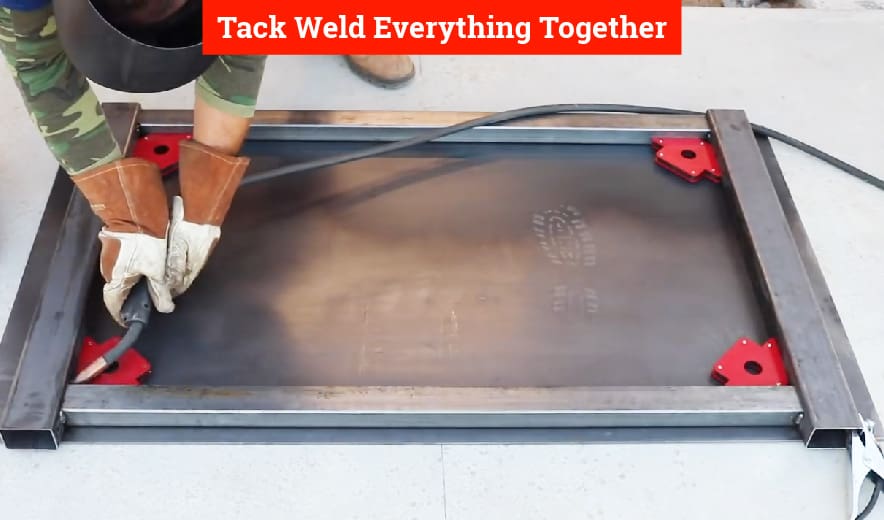
Then, you can tack weld everything together.
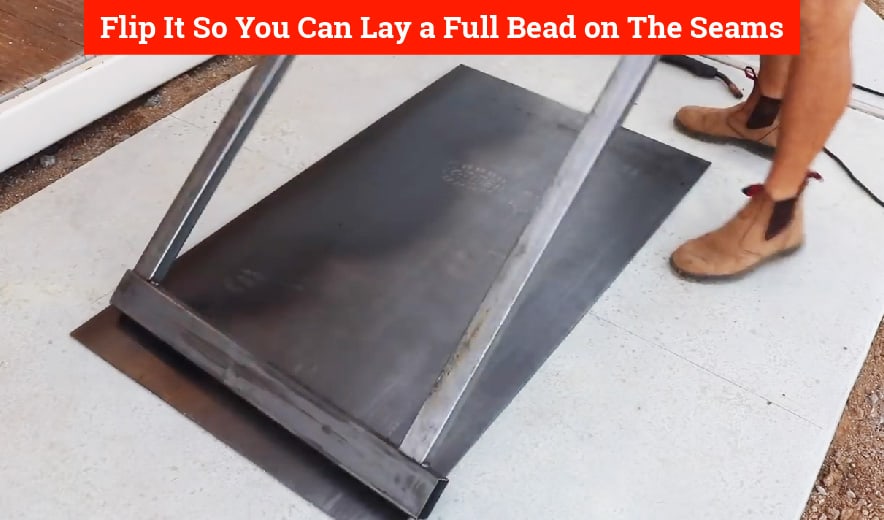
Once you tack weld your frame together, flip it so you can lay a full bead on the seams. Flipping it helps distribute the heat – that way you don’t overheat the metal and blow a hold in your new table legs!
Now, repeat this process for one more side.

Pro-tip: you can assemble everything on top of your tabletop and use it as a reference. Since you’ve checked a corner and know it is a true 90 degrees you can double check your frame assembly against the edges as one more way to make sure everything is square and true.
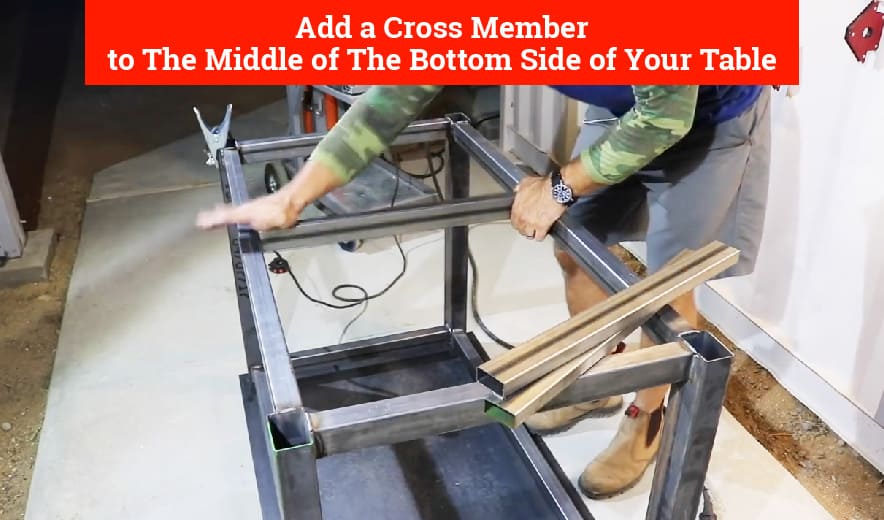
Once everything is fully welded together, you can start to put the cross members in place.

As you tack the two in place, you can add more cross members for more stability, and tack weld those in place too.

Once those are tacked into place, be sure and add a cross member to the middle of the bottom side of your table – in the middle. This will create a very stable frame for your new welding table.
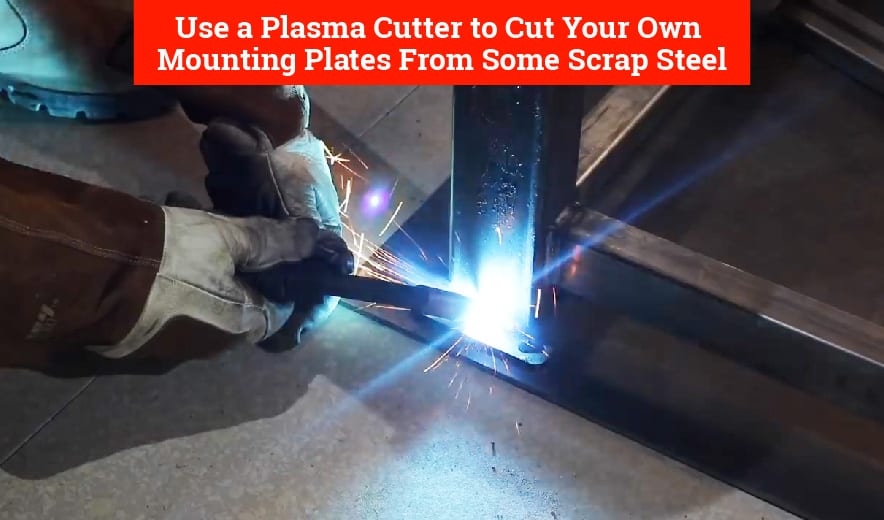
Now, you can buy these mounting plates at a local metal supply or you can use a plasma cutter to cut your own from some scrap steel.
Speaking of a plasma cutter, if your thinking of picking up a multi-process machine that has a plasma cutting function, check out this review.
Now, you weld your legs to this plate so you can mount wheels on it later. It’s the mounting plate from the castors.
Now your frame is complete. Let’s move on to building our accessories.
Also checkout the article on How to make an ax that gives you double effect
Accessories
Add some perforated tubing along the inside of the legs.

You can then slide some smaller tubing into this – and we will use this later to expand the table.

Pro-tip: If you have any galvanized metal, remove the galvanized coating BEFORE you weld. The coating is very toxic. You remove the coating in a few hours with a citric acid bath.
Drawers
You can use some simple tube stock for drawers. Here they are being welded together just like the frame with our sturdy magnets. You can pick a size that makes sense for you.
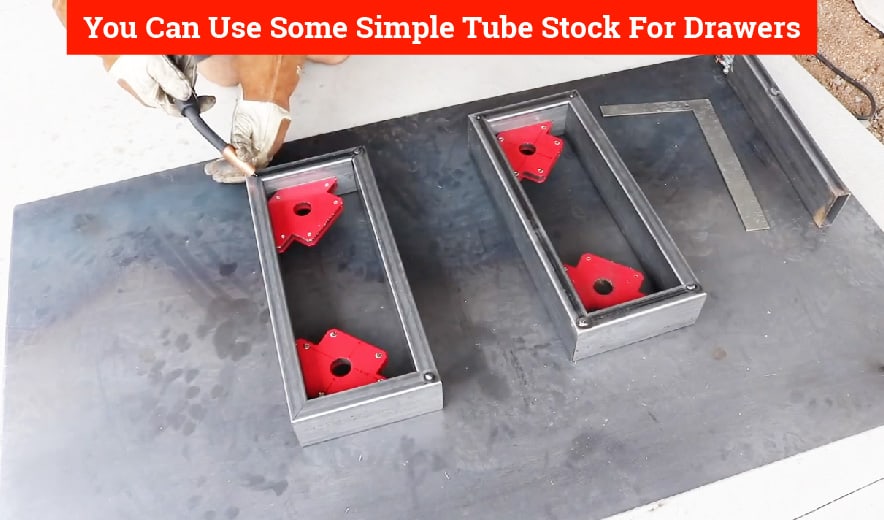
Make sure you grind down your welds on the drawers and throughout our build! A good cordless angle grinder can save you a lot of trouble.

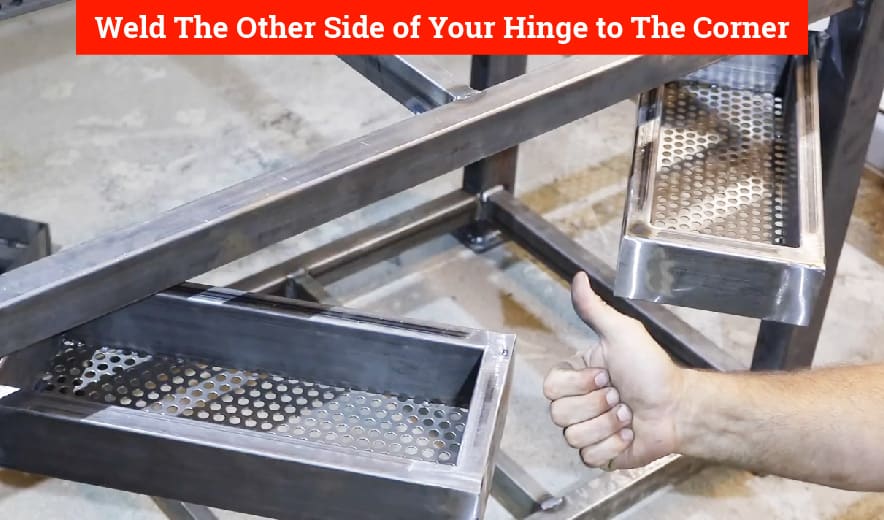
Now, you’ll want to mount these drawers with hinges so they can swing out, so make sure you weld one side of the hinge in place with a full weld.

Add perforated sheet metal to the bottom for a drawer base. The perforations are great because they let metal shaving fall out.

Once your drawers are complete, weld the other side of your hinge to the corner posts of your legs so they swing out when you need to access them. Looking good!
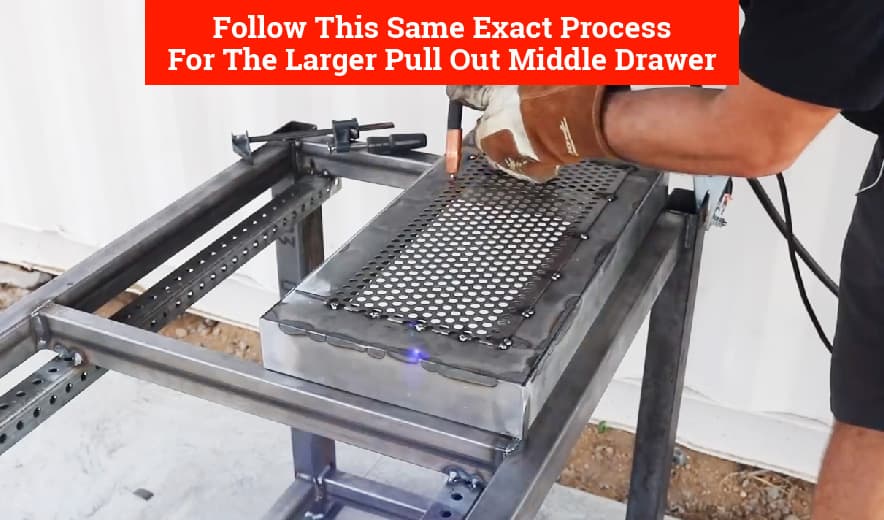
We are going to follow this same exact process for the larger pull out middle drawer, just without the hinges. Note: he is using a flat bar to make the drawer because that’s what he could find in the scrap room – so you can feel free to do the same with whatever materials you have.
We also think you would like a cool welding project on how to weld a mug from Rebar Scraps
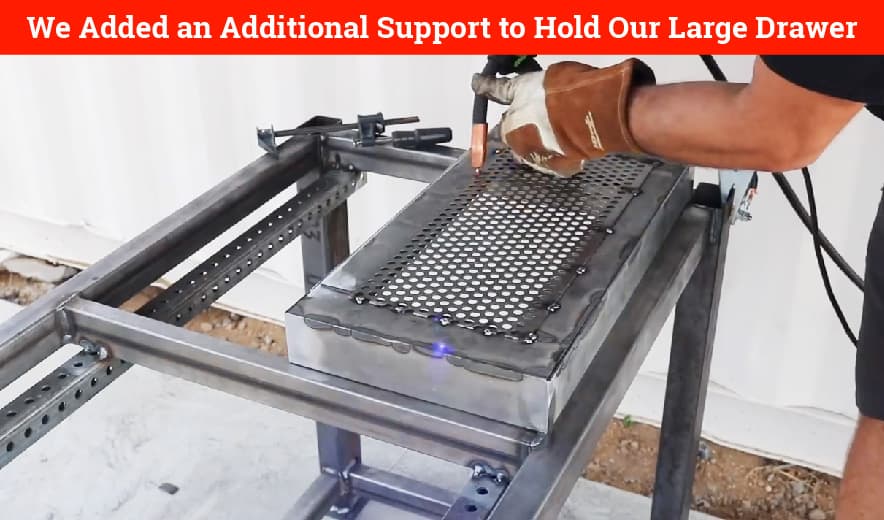
At this point, double check your frame and your drawers. If you need additional support, add any cross members to steel you may need. We added an additional support to hold our large drawer.
Now all your major accessories and your frame are complete. Let’s get ready to paint.
Painting
Clean down all your steel with denatured alcohol or paint thinner, this will remove the mill- scale, grease, and grime.

Pick a color that you like, simple rattle cans will do a great job.
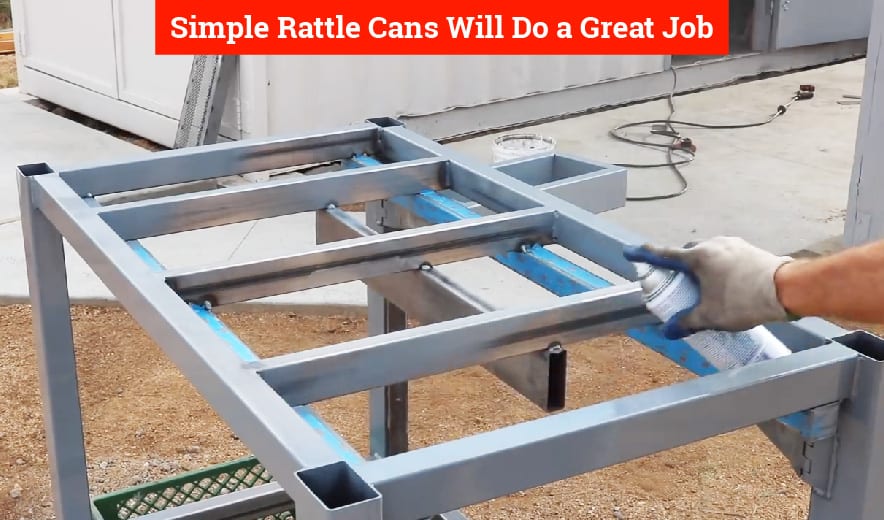
Use penetrol to coat the perforated steel, it will retain the natural color and protect the metal from rusting.
Finishing
Let’s start will the small stuff:
Miscellaneous
For your frame, you’ll want to mount your castors.

Then, install your main drawer.
The drawer itself is mounted on some drawer slides and the slides are mounted to brackets.

which are drilled into the frame.

Mount your leveling stops – they keep your table in place so it doesn’t roll away.

They are made from a simple coupler nut and threaded bolt.

Now it a good time to mount any brackets that you want for your table. (a good place for your angle grinder, hood, tape measurer, or spare regulator.)

Tabletop
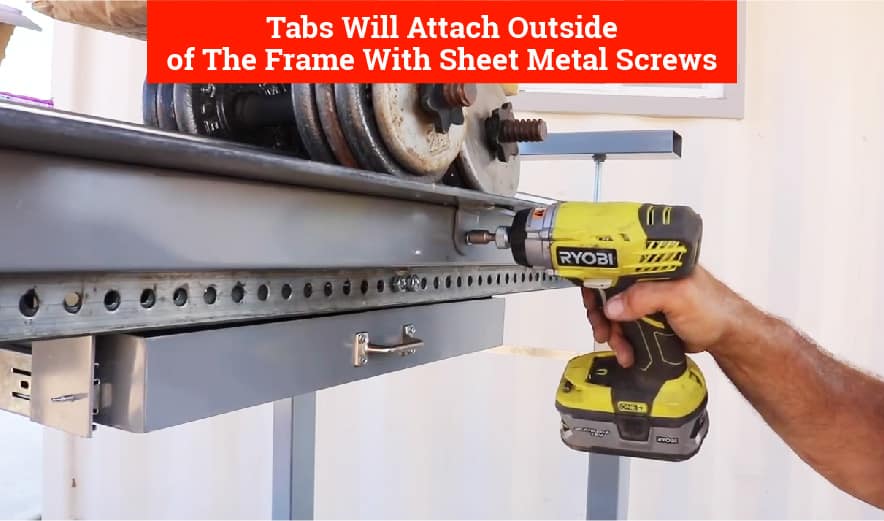
What I really like about this build is that tabs were used to mount the top. This allows you to easily switch out the top if you want to make any future modifications or changes.
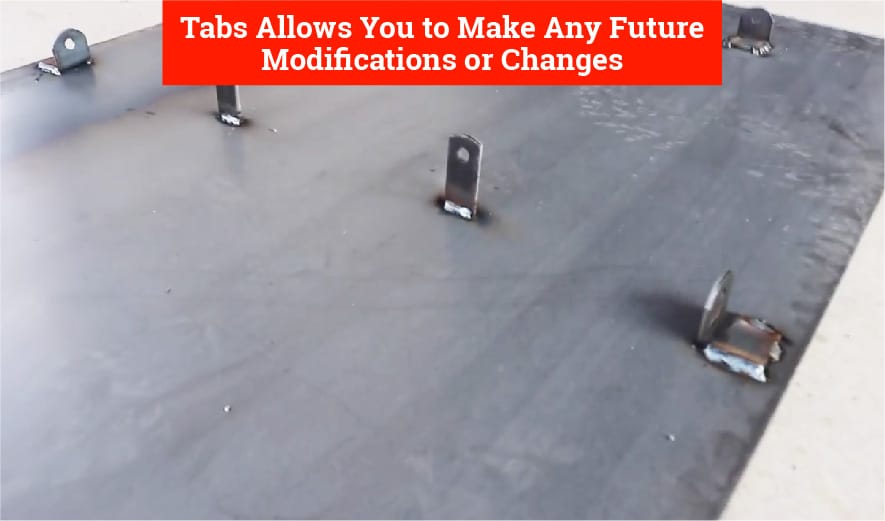
The tabs are simple, and they will attach to out outside of the frame with sheet metal screws.
Expansion Section
Now, remember those perforated tubes we mounted on the frame earlier?
We are going to use them for an expanding section on our table.
Slide some smaller tubing inside the perforated tubes, and we will weld a cross section onto the two sliding tubes to made one solid pull-out section.

Use threaded bolts and nuts to tack the expansion area cross member in place.

Tack the bolts to the cross member (the cross member should be sitting on top of the bolts).
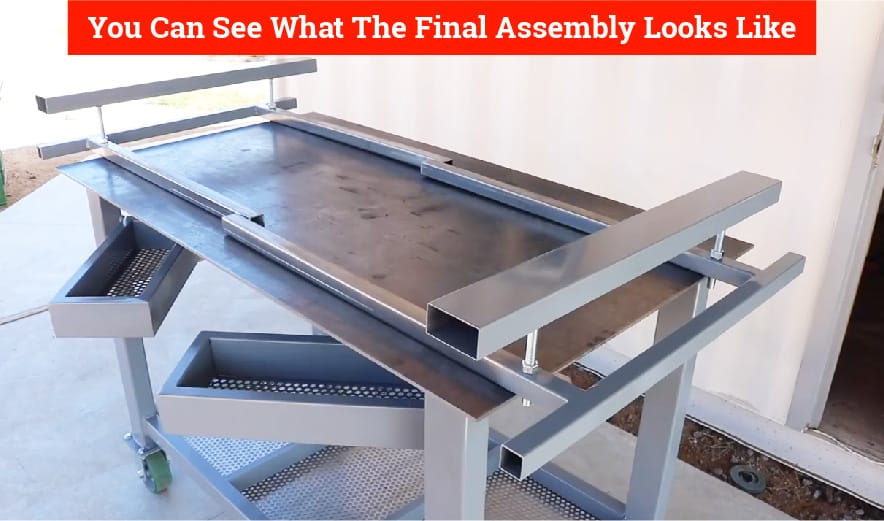
You can see everything mounted together- they are out of place in this shot, but you can see what the final assembly looks like.
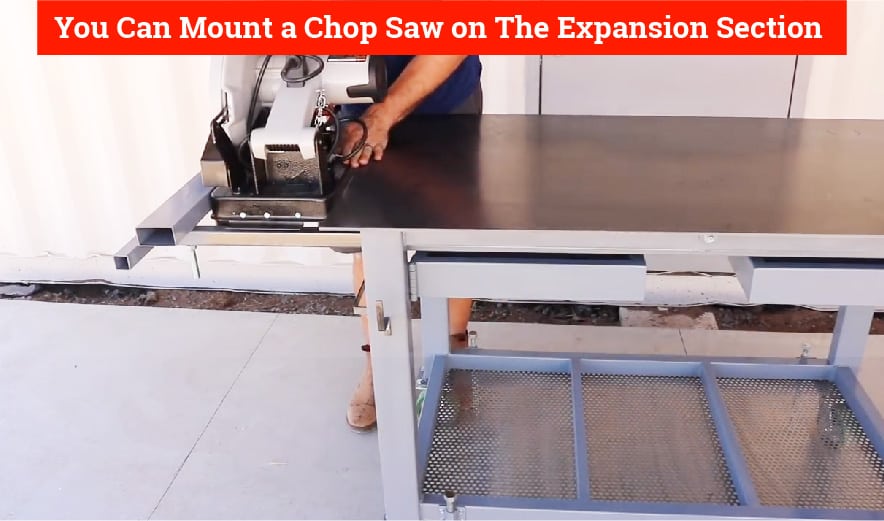
This is a great section to have because you can mount a chop saw on the expansion section and use the table to cut wood or metal down to size for your project.
Electrical
You’re going to need power for your table and all the tools you’ll be using. The simplest method is to mount an extension cord to your table. I would upgrade this to a longer cord personally, you can make brackets to hold the entire cord and will not need a separate power cord, it’s easier and a great upgrade.

And that’s it. You have built a durable, highly functioning welding table that will grow with you.
Conclusion
So you learned how DIY welding tables can be easy and fun to make We’ve created a table that will serve you for many years to come. Once you use your table through several projects you make want to make some changes or add some additional features. That’s the beauty of this welding table – you can change it around as much as you want! Have as much fun adding to the table as you did building it the first time.